Before anything else, preparation is the key to success.
Alexander Graham Bell
OK, folks. Post one of my restart. I hope you like.
Storm’s coming! Time to cook something to have ahead, just to be prepared.
It’s November 21st here in Nova Scotia, and depending on who you hear/see we’re either facing a slightly stronger than normal late fall storm or Armageddon with over 100mm of rain. A day or two ago I even saw reports that we may lose power for “several days”. That would suck, especially with regards to my design business where if I don’t work I don’t get paid.Even though I hope for the former, I have learned long ago to anticipate the latter. That way at least you’re prepared. And potato chips never really last long enough to go bad, even if not used at the intended time. So the ticket is to do an easy “make-ahead” recipe.
As an aside, but related to my introductory quote, a work companion and I designed the logo for the Alexander Graham Bell Foundation, and their extensive Brand Guide. If inclined, you can see the identity logo here.
This recipe is sort of made up by pantry surfing. It’s loosely based on a classic Italian sausage and cannellini bean recipe. But I live 30 minutes away from the nearest larger grocery store and I don't keeps cans of cannellini beans (AKA white beans) as a staple. I know some of you do, but not me.
Most people do have pretty much everything else in this recipe readily on hand, and it's the kind of meal that comes together quite quickly, which is a plus. Around 30 minutes, give or take a few.
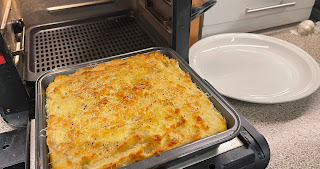
This is a perfect dish to make ahead and reheat. So if your power is out and you’re running a generator you can plug in your air fryer/convection oven or microwave for a short time to reheat.
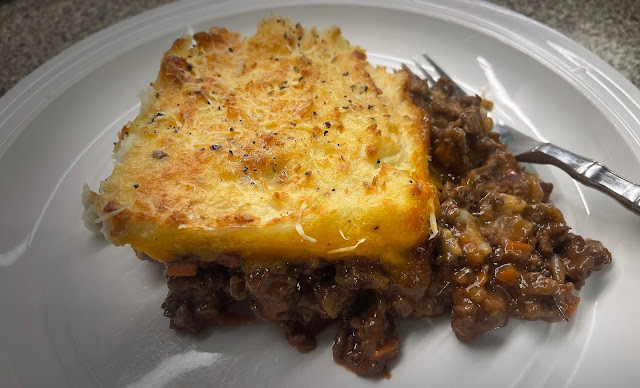
Armageddon or not, it’s one of those great meals for cooler, overcast days. Make sure to cut everything in larger than normal chunks. It makes the end result more "rustic". This is something that sticks to your ribs and makes you feel comforted and warm inside.
RECIPE
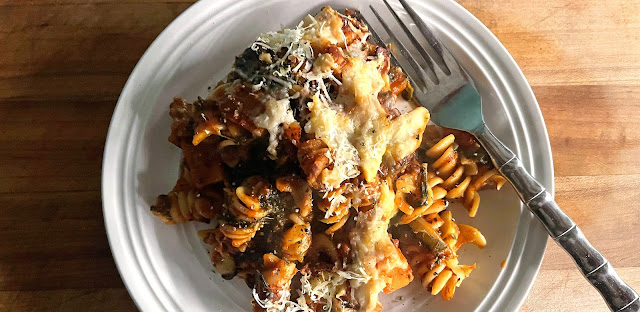
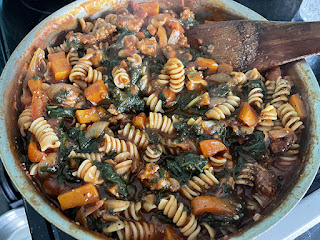
Italian Sausage with Spinach and Rotini
Total time (without optional baking) about 35 minutes.
1 tbsp olive oil
1 medium yellow onion, halved and then sliced
1 large carrot, in large dice
4 large garlic cloves, chopped
400g hot Italian sausage meat, torn into chunks
2 plum tomatoes, chopped
1 jar of strained tomato sauce (passata), plus enough water to make 1L
2 tsp oregano
1 tsp sea salt
1 tsp cracked black pepper
250g uncooked rotini
2 cups chicken stock water, or more as necessary
1 cup pre-cooked spinach (can use thawed frozen)
grated parmesan
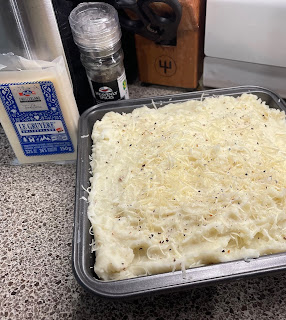
Cook’s note: if you like crispy bits on your pasta, once completed turn it all into a baking dish, sprinkle with parmesan and bake until browned on top. Just ensure there's enough sauce remaining to make sure it doesn’t dry out during baking. The pasta does tend to absorb it.
 DIRECTIONS
Heat the oil in a deep skillet. Add the onion and carrot and sauté until the onions soften. It’s perfectly fine if both the onions and carrots brown a little. Then add the garlic and sauté for 30 seconds.
Add the sausage meat and cook until no longer pink. Then add the chopped tomatoes, tomato sauce with water, oregano, salt and pepper. Cover, reduce the heat to medium low and let cook for 15 minutes. This step helps the carrots cook through since they’re in larger dice.
After 15 minutes is up, stir in the rotini and chicken stock. Bring back to a boil, cover again, and reduce the heat to medium and cook for an additional 12 minutes. Stir occasionally to ensure it doesn’t dry out.
Pasta cooked this way invariably takes longer than if it is boiled separately. If the pasta needs more water/stock and longer cooking time do so.
Once the pasta is done, remove the pot from the heat and stir in the chopped spinach. Taste for seasonings and adjust.
To serve, place in a bowl and top with grated parmesan.
If doing the additional bake for crispy top, preheat oven to 400°F, place mixture in a baking dish and top with plenty of parmesan. Bake for about 25 minutes, or until browned on top. (Air fryer 375°F for about 12-15 minutes.)
#ilatianrecipe #homecooking #countrykitchen #italiansausage #makeaheadrecipe
.......................................
©2021 Docaitta Lifestyle. Feel free to disseminate on any and all of your social media orifices. The more the merrier. :-)